Sunday, March 31, 2013

On a MCM kick!

I picked up another credenza for a heck of a deal! This was made my Broyhill in the early '60's. 
The guy had been keeping it outside and had no idea what he had. 
This was located in a seedy part of town. So I took my pit-bull and a little something extra 
for protection ;)    (I'm allowed to do that btw!)

There are so many on craigslist in the natural state, albeit refinished. They look great! But
they don't seem to sell that fast. I find that people like the ones that are painted.
Since this wasn't in pristine shape, I didn't feel so bad painting it. 
                     I chose gray and black for this one. I refinished the top in espresso.
I redid the drawers as well. Everything was a walnut veneer. Remember with veneers, go easy
when you sand, lest you hog all the veneer off!! Ask me how I know this......
  I love how the wood came out! This is a very masculine looking piece, quite 
different from what I usually do. 


Wednesday, March 20, 2013

Vintage Chest of Drawers

This chest/secretary thing is so unique! It's been sitting in the garage forever! 
I was almost so fed up with it, I almost put it to the curb! (Do you ever have so many irons
in the fire that you just can't be bothered???!) 
Well, glad I didn't. I just decided to get to it and slapped on some white chalk paint. 
Then I thought I would try some artwork on top by using that cool staining technique
I used on the french provencial dresser awhile back.  Here
OK.  Obviously the before. This is a solid mahogany which the manufacturer covered in this
horrid orangey lacquer finish.  Look what was on top!!!
 This beautiful mahogany wood top!! So I chalked out a hibiscus flower, got out my stains, and went
to town!! I just used a combo of stains. Some I left on for a few minutes, and others I wiped away quickly. This is just a fly-by-the-seat-ofyour-pants type of thing. You really can't follow exact
directions. It's like painting. You just do it. Make sense??? Yeah, well, that's all I got!
All finished. And a few coat of semi-gloss poly 

The final version. Mahogany is so pretty when it's finished correctly! 

More pics.......

Tuesday, March 19, 2013

Reclaimed Wood Herringbone Pattern Ceiling Project!!!!

So I believe I mentioned a few weeks ago about wanting to try something different on our living room ceiling. It's vaulted and huge and so bare! I got a huge pile of 100 year-old reclaimed douglas fir.
This wood has so much character! I envisioned a wood that was distressed yet
smoothed over by coastal grays, whites and blues. I'm redoing the room in grays witha  
charcoal-gray velvet on the couch, silver walls, silver travertine flooring in a Versailles pattern,
touches of yellow, teal, white,,,,,I can see it all in my head. But for now, all I have 
is the ceiling. I worked for two solid days.

What in the world was I thinking!! Houzz and Pinterest should be removed from the Internet!
***Please click on the individual picture to see the larger format**


I need a wide-angle lens. I just can't get the whole room in the shot!

So here is how it all began and what I started with:
Of course I had a multitude of other projects going on!
 Over 300 square ft!  They were all stained and painted....one by one.....oy!  I used a weathered gray stain, sunbleached stain, and mixtures of white and gray milk paint  
(REAL MILK PAINT CO. is my fave milk paint!!) 
I would work in batches since I was limited in space. This process alone took me about 2 weeks.


My husband stripped each board of it's "tongue"(it was fabricated for flooring) and cut in 3' lengths. We made a jig for that part to assure each board was identical in length.

We measured off the center of the ceiling and snapped a chalk line. 
 From that point we found the 45 degree angle and started the first board. 
The boards were secured with Liquid Nails and a pneumatic nailer. 
(Lord help me if I ever get tired of this look!)
Excuse the armpit shot
We would check for our 45 angle to make sure we were on track. It is imperative that every board is cut identical when doing the herringbone. One funky board will throw off everything!

randomly picking out "random' colored boards
We used liquid nails along with the nailer. This is earthquake country baby!!
This is the part where the work came in. Thats 14 feet up! Mr Pretty stayed on the ladder, called out the measurement of each board, and I cut them and threw them up to him. Going up and down the ladder for each and every board would have been tortuous! Ditto for the boards that butted up against the boarder. I got really good at the chop saw and making miter cuts!! 
(BTW,,,each single row is 39 boards!! Um,,there were like 11 rows!
 Uh-huh...You can do the math!!


Click on this pic to get the full page effect. The wood is so cool looking!
The pics don't do justice to the chandelier!! 
Placing the very last piece!!! OMGthankyouJesusI'mdone!!


below pic shows part II beginning. (Does this never end???)
4-2-13
Getting ready for some silver travertine flooring!
Got the floor finished in the past few days! Versaille pattern. Man oh man, that is some work!
Still have to grout.....I hate grouting.


daytime-no cat
night time-cat


To see what the room finally looks like all done.....see HERE

I've since changed things around (2016),,,new rug,,dining room was painted a similar gray, chairs are gone,,,


Linking up at these great parties:


                                                   The Dedicated HouseRedoux


entered at East Coast Creative!!


Tuesday, March 5, 2013

Reclaimed Wood

I really love working with reclaimed wood. I found a few guys in Laguna that have a 
business, "True American Grain" traveling throughout the US and salvaging old wood from old barns and houses. They schlep it back home and farm it out.
I offered to make a sign using their wood and logo. 
Here's the wood:
 I believe he said he pulled this from a very old barn in TN. 

Sunday, February 24, 2013

Campaign Love

The "Dixie" Campaign desk is done!
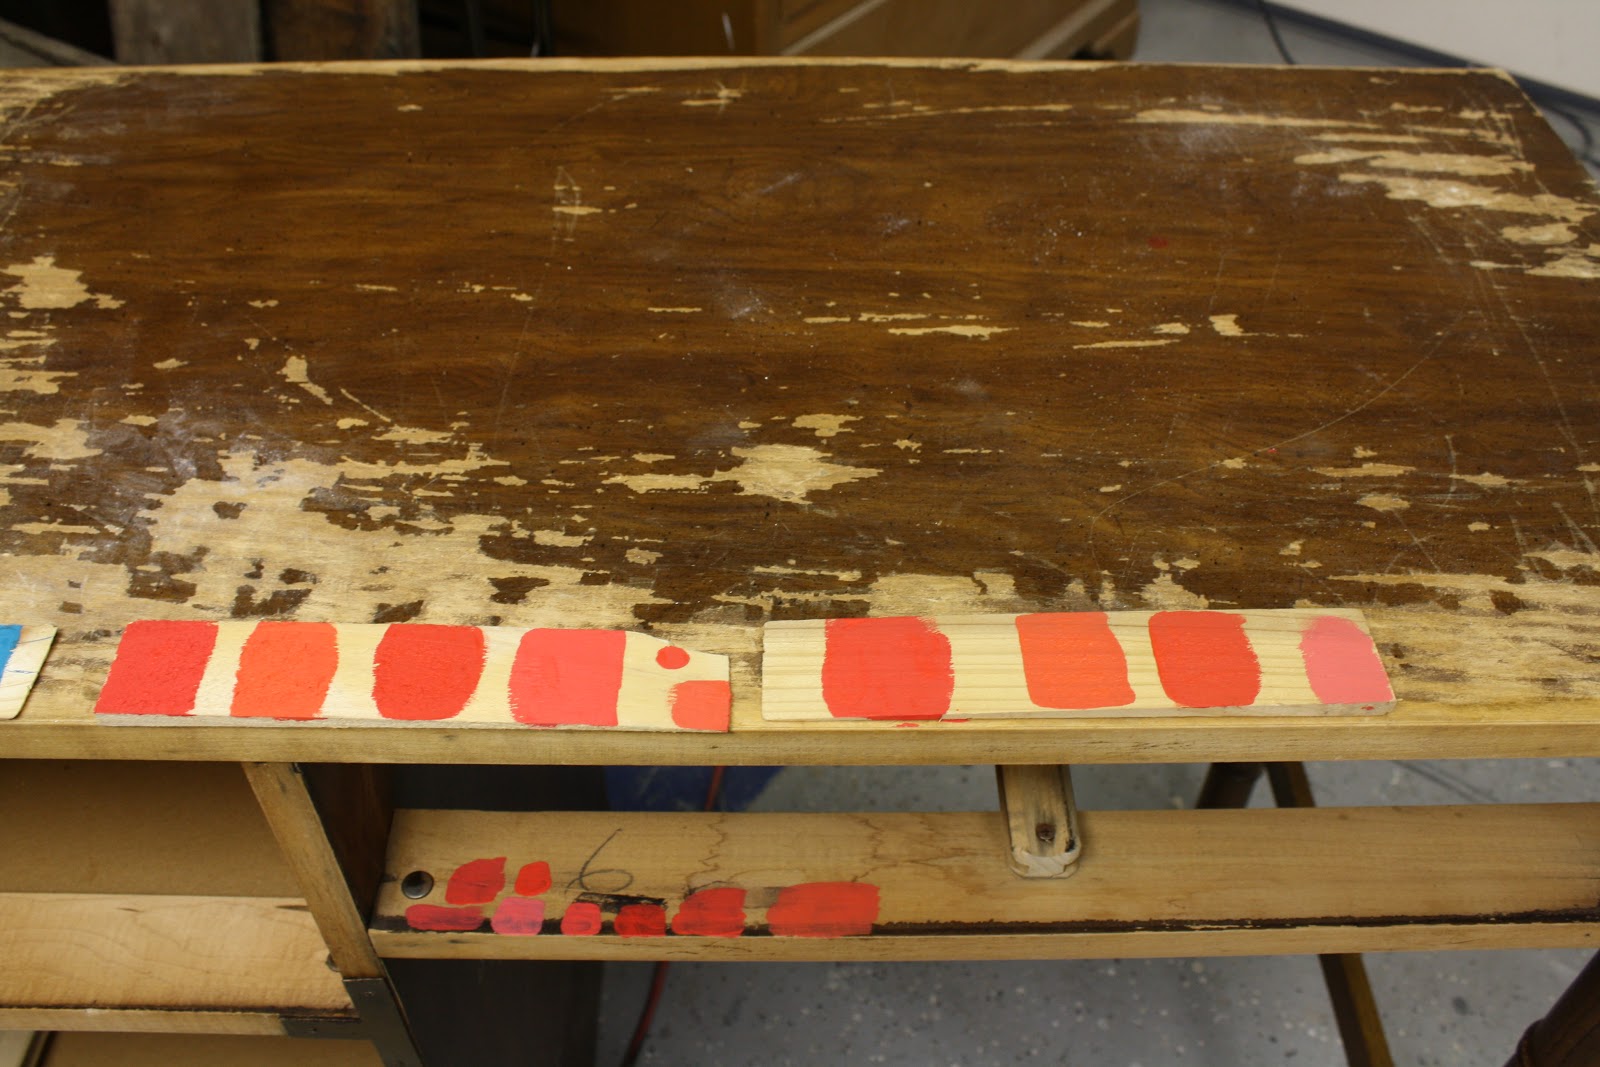
Thank-you for the 'coral' suggestion.  I tried to find/mix a coral shade 
that I loved, but couldn't. They all turned out to pastel-like. 
I'm all about the blues and greens, so I did a mixture of both! 

Lest you had forgotten the sad shape she came to me:
The Dixie Campaigner!! I almost had a heart attack when I first saw it! 

 I know,,,,,right??!! What the???!! So, I asked the women selling, "Oh, you started to
refinish (refinish?? more like mutilate) it?" 
Her:                     "Yeah"    
                               Me:  "Um, what did you use on the top?"
                                                    Her:      "Oh, a scraper."  (She showed me a chisel!)
    Me:      Audible gasp..........
Her:      "Was that bad?"
Um, Gee,......Ya think???!!!!
I actually think the surface of the moon feels smoother than the top of this desk. 
Running my hand over the top and feeling all the divots and gouges just makes me
cringe! This top should actually go through a planer to level it out. But, I'm fresh
out of giant wood-shop tools, so I'll have to try and wing it with my orbital sander.
And why is it that all the sellers with the cool heavy stuff live on the second floor of some

apartment????
And now:
           I staged it in my family room. I normally have a large chair in that spot. It matches great!
            I debated on whether or not to paint the drawers. They were in good shape, so I thought I would refinish them.  If I didn't like it, I could always paint over them. At least I have the option.

She had already managed to scrape off the edges.
                    
   Here were some of the orange/coral colors I was mixing. I ended up painting a MCM credenza              brilliant tangerine color (here), so I went with the blue/green family on this one. 
 
 This is the top of the desk after I did a ton of sanding. I was able to level it off pretty well.

    "Finn" the Betta, likes it. 
     The veneer on this piece was lifting up all over the place.
Glue, wood filler and finishing nails did the trick. 

While it does fit well with my decor, I did sell it shortly after finishing it.


                          I used a combo of BM "Emerald Isle' and "Caribbean Blue" in semi-gloss


   I would love to find one of those Jonathan Adler chippendale chairs to go with the desk. 


Linking up at these great parties:

                                                   The Dedicated HouseRedoux