Monday, March 17, 2014

An Ebonized Cerused Campaign Dresser

I picked up this very nice Lane campaign chest while stalking CL ;)
Ya know, if you've followed my blog at all, you know I'm into the unique and colorful. 
I hate doing the same old thing with the same old boring paint. I constantly strive to do something outside of the box as well as doing something different. Painting furniture has really gone wild in the last year. I don't know who put out the memo, but it used to be just me and one or two other ladies in my area. Now it's like every other person and their mother is doing it! Slap some chalk paint on a piece of furniture, put it up for sale at some ridiculously low price and voila! Professional furniture painter! 
 So, because of that, I like to mix things up. 
           I wanted to do the ceruse technique again.  If you missed my previous post, click here.....
At the bottom is the original drawer, stripped and at the top, stained with aniline dye in ebony.
 As much as I love these finished pieces, they are quite the pain to transform. It's the hardware!! Do you know much work it is to remove all of these pieces? The handles are bad enough to clean and scrub and polish but then add in all the corner pieces and their screws! There was like, 60 of them!?? Those were sprayed because they are just too small to polish. Everything else got elbow grease and Brasso. Then comes the fun task of putting everything back on! Seriously. Takes forever. Oh, when removing the pieces, I mark all their positions. Stuff just fits better if you put it back in their original spots. IMHO

Like the other one I did, this is a walnut veneer. Still waiting to try this out on an oak piece. 

Here she is! 

                                             Obviously the ceruse just got done to the drawers. 
                                             The body was done in a SW semi-gloss black enamel.
Black is so hard to photograph
 I rolled and brushed the enamel. Numerous times. 
I love this piece because it's not cookie cutter. You won't find another out there like it! 


Thursday, March 6, 2014

French Vanity in a new milk paint color!

I found this vanity that a lady was selling as a set. I've been on the lookout for one just like it so I could try out this new color called, "Gypsy Pink" from the Real Milk Paint Co.
I saw it on another vanity similar to this one and thought it looked gorgeous! 
 I did sand the top down completely. In other parts, I didn't so I used the bonding agent.

Voila!
 I mod podged some fabric on the sides and painted the bottoms in "Radiant Orchid". 
 Yes, this really is the color! More like a fuchsia than pink. 
 I used a tung oil and paste wax to finish off the paint.

Tuesday, February 25, 2014

A Frenchie of a Different Color

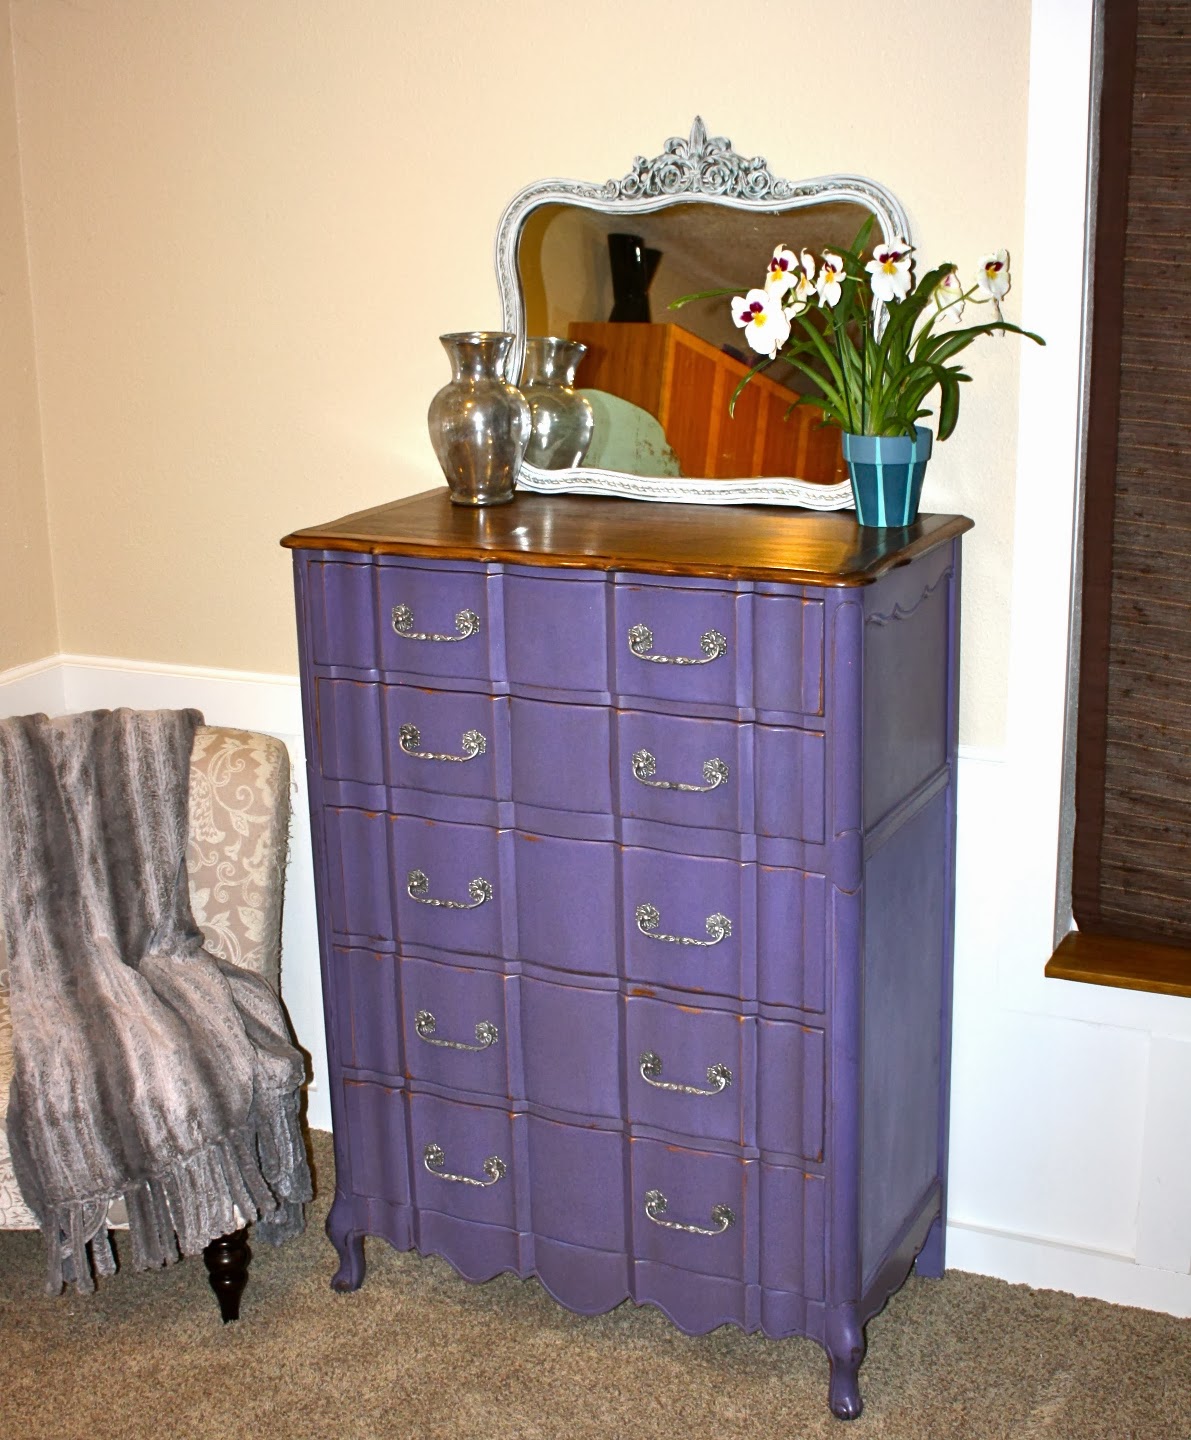
I got so tired of having to move around this guy in the garage, that I finally made the effort to paint it. I got it in January,,,,,,of 2013.  
Well, I didn't want to rush it. 
 I was saving it for something special. I like the standard white. But sometimes you just have to try something different.  
"Dusty Amethyst" 
My own custom color made into chalk paint. I used 3 different shades. 
The 3rd and 5th drawers are painted and sanded. Nothing else. The top two had my black glazing and dark wax. Quite the diff eh?
And of course my signature two-tone look. 
I love the dark walnut top with this color. 

Ah, this hardware. God I hate doing lots of hardware. Each handle is
3 separate pieces. That's 30, if you don't feel like doing some math. Bad enough having to remove all of it let alone painting it with gray chalk
paint, dark wax, buffing and then silver gilding wax. Oh, and a sealer. 
I just had to add some coordinating fabric to line the top drawer! 
Purple Ikat and Velvet??? Hello??!!!!

Sunday, February 23, 2014

Subway art on Reclaimed wood

I was commissioned to do two boards for a couple who saw my work somewhere (?)
lol.  They wanted it done big and using reclaimed wood.  They found a place selling the reclaimed wood so I went there and found a barn wood bonanza!! 150+ year old wood. 

Forgot to get a pic before I cut them all and pieced the board together. 
But here is a shot of the wood in raw, albeit cleaned and sanded:
                                These boards are so dense and surprisingly heavy.


They wanted these specific colors. I used milk paint on one because they have the most awesome shade of turquoise! I've used it on a lot of pieces and people just love it. The second color was a custom mixture of chalk paint.


 This is my house, not theirs.  I just propped it up to get a photo. It would obviously hang on a wall.

And here is the second one....

Saturday, February 15, 2014

Another Custom Staining Decorative Top.

I've been somewhat lax in keeping my blog updated. Not because I haven't been doing anything but rather I've been doing too many things! Does anyone else start on one project, see something else that looks cool, start on that, only to get sidelined by, yep you guessed it, something else!
 I think I have furniture repurposing ADD. I have so many projects going on, that it seems like I'm just spinning in circles. I'm even making Vertical Succulent Gardens from old cabinet doors! 
(But that's another post!!)

So lets just try to stay on this track.......
This is my 3rd or 4th "painting with stain"  top that I've done. 
To see the first one with some how-to's, visit this post. 


I picked up this mid century solid mahogany piece off of CL (where else??) And while it did have a few issues, it was nothing that wood glue, clamps and some sanding couldn't fix.
Don't be afraid to grab pieces that look like this. You can usually get them at quite a discount and they are pretty easy to fix. If you are going to stain the wood, then use a stripper to get off the old finish. 
If you just plan on painting,

Wednesday, January 15, 2014

A New Frenchie in Black and Gold!

I came across this vintage Thomasville dresser and nightstand. Now, it wasn't horrible, just 
a bit dated. Everyone always does white and gray or combos of said colors. I wanted to try
something different. 
                           I went with black, a very soft, light gray and gold. Love it how it finished up!

The tops on these are that laminate type of paint. I really don't know what it's called. 
 I wanted to see what the wood top was like,

Friday, January 10, 2014

Whistlin' Dixie with my new MCM!!

I am on a roll with these mid century modern beauties! They are so much fun to re-do!!
This is the first Dixie-made one that I've come across.  Although, this isn't the first one 
to be in such rough shape!  Have a looksie,,,,

   What in the world do people do to the tops of their furniture??! I mean, come on! 
Do they sharpen their ice skates on them??

Woohoo,,She cleans up rather nicely!! Gotta love wood. It's so forgiving! 
Walnut is gorgeous when it's refinished!!
Can you believe the difference in the top??? Some sanding, and some nice dark stain,,,,,,

Ok.....Notice the bottom left. There was a big chunk missing. I knew I would have to paint this
edging but I was hoping that I could fill it in with my wood epoxy without it being too noticeable.