Wednesday, January 30, 2013

Stickley End Table

I found this darling (well, it is now!) side table from some guy that was clearing out
his mothers house. It was trashed. Didn't find out until I got it home and did
some research that it was a Stickley piece. 
Fifteen dollah make you holla!! LOL
           I had already started when I remembered I hadn't snapped a before photo! 
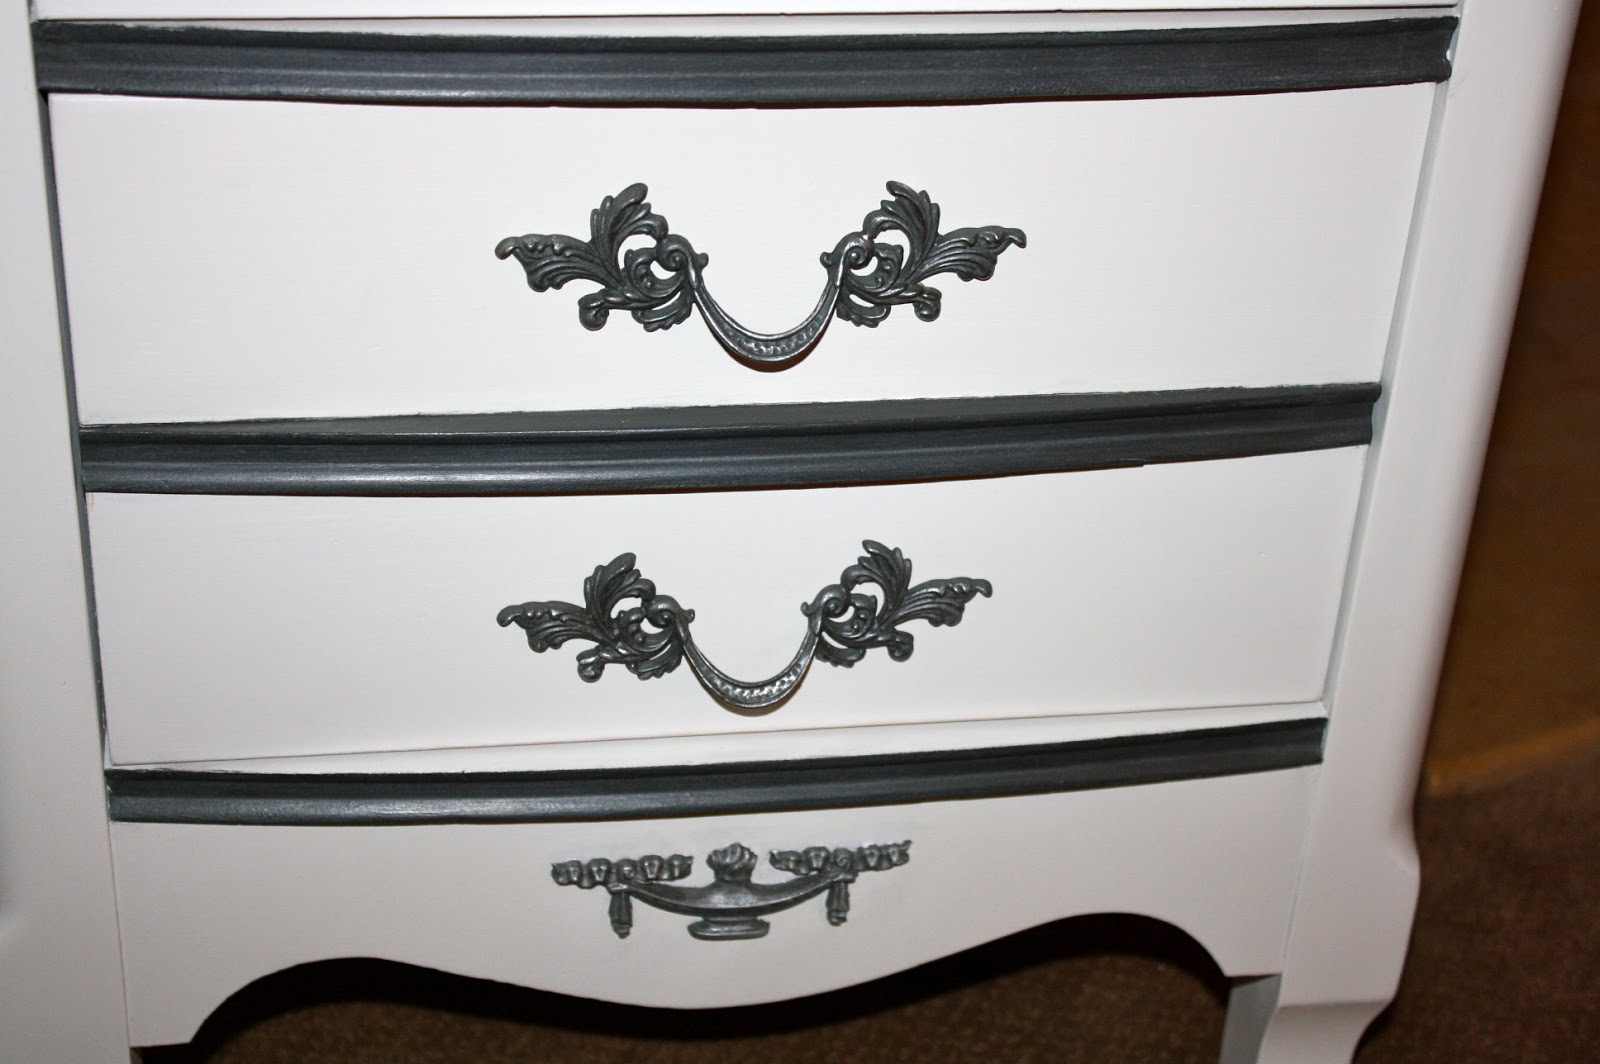
Solid mahogany with this cool design inlay. As you can see, it was quite damaged. These pieces can actually be worth quite a bit in a pristine state. However, pristine was 3 decades ago with this piece. It was too far gone. But I did save the solid wood top. It finished up beautifully.

I'm still soaking the hardware. I'm doing the patina soak. Cider vinegar and sea salt.
Hoping to get some of the verdigris look. 

So first off, since this is mahogany and we know how this bleeds, I painted it with a wood sealer. You must start using this! Plus, it protects the wood. So, if in the future anyone wants to take off the paint and attempt to restore the wood, they can. With this stuff, you don't have to sand the crap out of the wood and damage any intricate areas (like the legs) in order to get the paint off. It's quick, easy and dries fast. Sometimes you can use a white primer but sometimes you don't want the white primer to show when you are distressing. 
Use the seal coat. 

Friday, January 18, 2013

Little Frenchy nightstands

Found these little nightstands a few weeks ago and thought
I would spruce them up.


Did my own chalk paint in white and I used Cece's Vermont Slate
as an accent and on the handles. I also mixed some black paint with 
some silver glaze to go over the slate. 


I tried the wax paper method for this transfer from the "Graphics Fairy".  Lemme just say that
wax paper does not mesh well with my printer! However, doing a little improvisation, I taped the wax
paper to a sheet of printer paper and got fine results! Be aware that once you start your transfer, be darn
sure of it's placement! Once that paper touches anything the ink is transferred! Ask me how I know this.........Windex does a fine job of cleaning up any oops.  Oh, and waxing or applying a topcoat will
smear the ink. I thought it would have dried after a day or two, but apparently it doesn't. So, I wiped it
down with water and was left with what you see above. These tops got an acrylic top coat.


Sunday, January 13, 2013

Chalkboards and message boards

My sister dropped off some picture frames so I thought I would
up-cycle them into chalkboards and little message/jewelry hanging thing-a-ma-jigs! 

I painted with chalk paint, waxed, attached fabric and some chicken wire
and....here ya go!.....


Wednesday, January 9, 2013

French Provincial Make-over

 So I found this beat up set off of, where else???  CL.  
These little numbers are pretty hot items around here now. I'm
always on the lookout for someone who just wants to get rid
of it and not hassle w/the selling process. 

Behold this awesome beauty.......

 
I know, right??? On the positive side, it was solid wood dove tailed drawers. 
Other than the grease, grime, filth, OMG contact paper and chipping paint, it was in good shape!

I wanted to try something different on this set.  


       Taking my inspiration from Beth over at SawdustandEmbryos, 
I decided to try her staining technique. 
I stripped the top using my Soy gel stripper and sanded with 80,150 and 220. 
                                   First, I drew out some flower petal designs using chalk.
                     Then, I gathered my tools and stain and spent the next 4-5 hours "staining".
I won't go into too much detail because I pretty much went by what Beth did.
Mine looks a lot more "blended" then hers.  It all depends on what final look you are going for.
I used a very small brush to outline the petals so I could keep the lines of the petals separate from
 the neighboring one.  It's not as difficult as it looks. Just a little time consuming.
But I love doing stuff like this. 

      I used Varathane's "Kona" and "Weathered Gray" and some "Red mahogany" thrown in there too.

I love the way the stain turns out when you use it like paint!  This was kind of an experiment. I figured
if it didn't turn out well, I could just paint over the top.  The wood on top of this dresser wasn't exactly

Can't get enough of this color and my new workshop!!!!

I'm on a turquoise color kick! I just love this color from the 
Real Milk Paint co.  They call it cobalt but it's this stunning shade of turquoise. 
This 100 yr old buffet was in great condition. 
I didn't want to cover up the wood but just wanted to enhance it a bit. 

 I forgot to snap a pic before I started.  The wood is quarter sawn oak and hardly needed any
attention. I sanded the doors and drawers and went over them with some stain that
matched the body. Painted with the milk paint. Oh I forgot, I actually did a first coat
with the color "peacock" and then did my second coat in cobalt.  I didn't want the color
to be too bright and I like the greenish-blue underneath.

I have to post a pic of my new garage makeover-workbench area!  Everything was done with stuff
we already had laying around the garage. The wood flooring on the wall has been up in the rafters
for 5 years! Wasn't enough to really do anything with so why not bling up the workspace area?!

 Mr Pretty built me the new work bench and put the wood on the wall. I stained and sealed, as usual!

Thursday, January 3, 2013

Victorian Dresser in Turquoise Milk Paint

I picked up this stunning dresser and matching mirror awhile back.  
It most assuredly is from the Victorian period. So I'm putting it's age 
at 110+!  Other than a few dings, broken casters and some carvings on the top, it
was in damn good condition. (Minus the hideous contact paper lining the drawers...OMG)

My fave shade of milk paint, cobalt blue (really turquoise) from the Real Milk Paint Co.
I'm in love with this color! It so suits this era of furniture, IMHO. 

So here is the application of the milk paint. I had already sanded and cleaned the wood and touched
up stain in the spots that needed it. The milk paint flaked perfectly. I didn't want a lot of paint,