This add on to our bedroom has been nice, but it's a wasted space. We have the tiniest bathroom and this huge area in the back of the room that no one uses. Except the cats. So, time to move things around.
Here is what used to be:

The part where the bed is was the original part of the house. The extended part with the window is the add on. You can also turn right and exit a pair of french doors.

So the wall with koi picture, is the walk-in closet. You can just see the door to the right. This wall was taken down so it's even with the french doors.

So this wall was pushed back even with those french doors. In pic 2, imagine drawing a line down the center. To the left of the line where the cabinets are is the new closet. To the right of the line will be the new bathroom. And those windows are now french doors.
The office area (in the first pic) is now the new walk-in closet. Mine! All mine!

Hub did all of this framing in a few days. well, he built this entire add-on way back when we were dating!! Yes I know,,,y'all wish you had one like him,,,,

I stained the red oak doors in ebony. To match my cat. Kidding.

I ordered the french doors raw and spent hours and hours getting them like this. I used a black aniline dye and many hours of sanding. I love the grain looks w/the black.
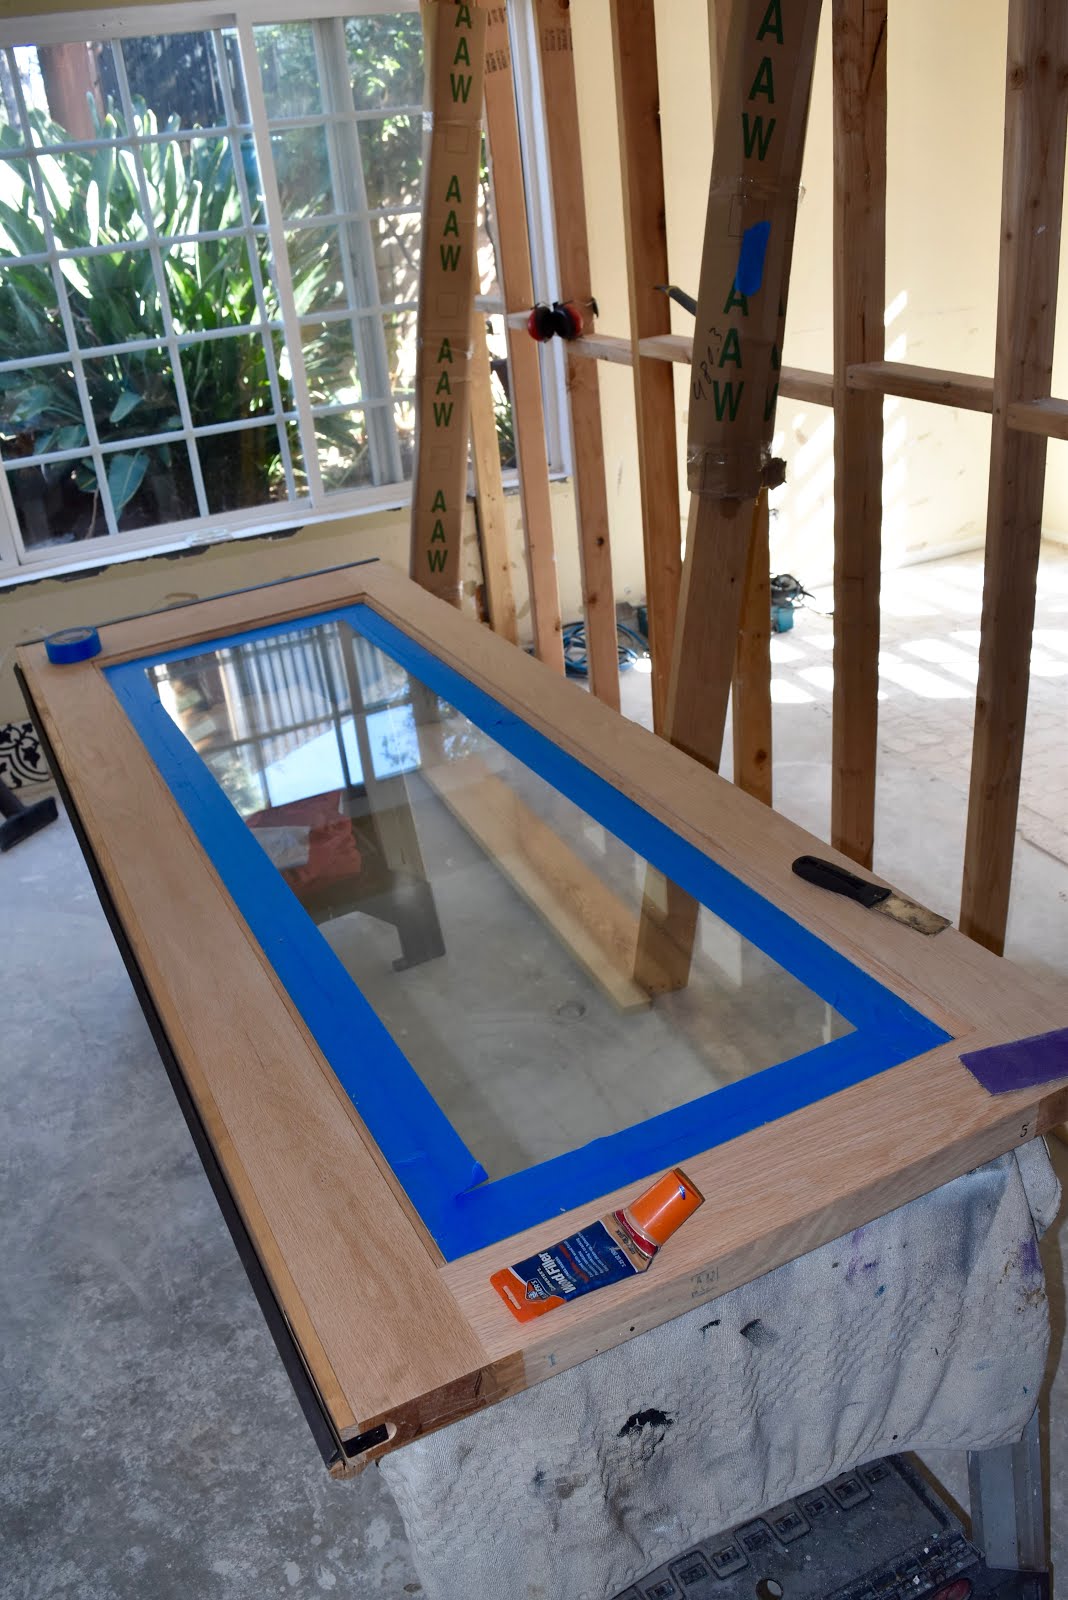

Tools of the trade to transform the french doors!


And my custom closet is to die for!

very hard to get photos in here!

So for reference, Pic 2 is the same angle as this one below. This is how we've been living!

Behind the plastic curtain is construction. We basically created a hallway on the room addition. To the left where the office was, is now the walk in closet. To the right will be the new bathroom. The french doors will be removed and the new large shower will go against the back wall.

Standing in the old closet and looking towards the hallway/new closet area. We took up the ceiling into the attic for a vaulted ceiling in the new bath area. Where you see the opening in the framing, will be a pocket door. Here is how the hallway side of it looks :

And below, standing inside the bathroom where the french doors are. We drywalled the inside, partially. The plastic on the doorway will be the pocket door, the smaller room at the back of the photo will be the 'water closet'. there will be a pocket door(or sliding bard door) that will span that opening.

The vaulted ceiling was lined w/oak flooring. It's a hand scraped french oak I found on craigslist from someones leftover remodel. It's quality flooring that I got at a great price! We also installed the skylight ourselves. Those french doors are coming out since the shower will be where you see the white insulation. It will be a 7'X4' shower.
DH is putting in the skylight
DH is putting in the skylight


In this last photo, the vanity will be going against this wall with the casement window just to the left

The next thing to do is to trench this slab to make way for the new sewer line and drain lines. Where u see the black paper is where the current shower/toilet is (on the other side obviously). So we have to demo that shower and have someone trench the cement slab for the new line. Then the old shower area will become a smaller walk in closet for my husband! Hey, he doesn't need as much room as I!
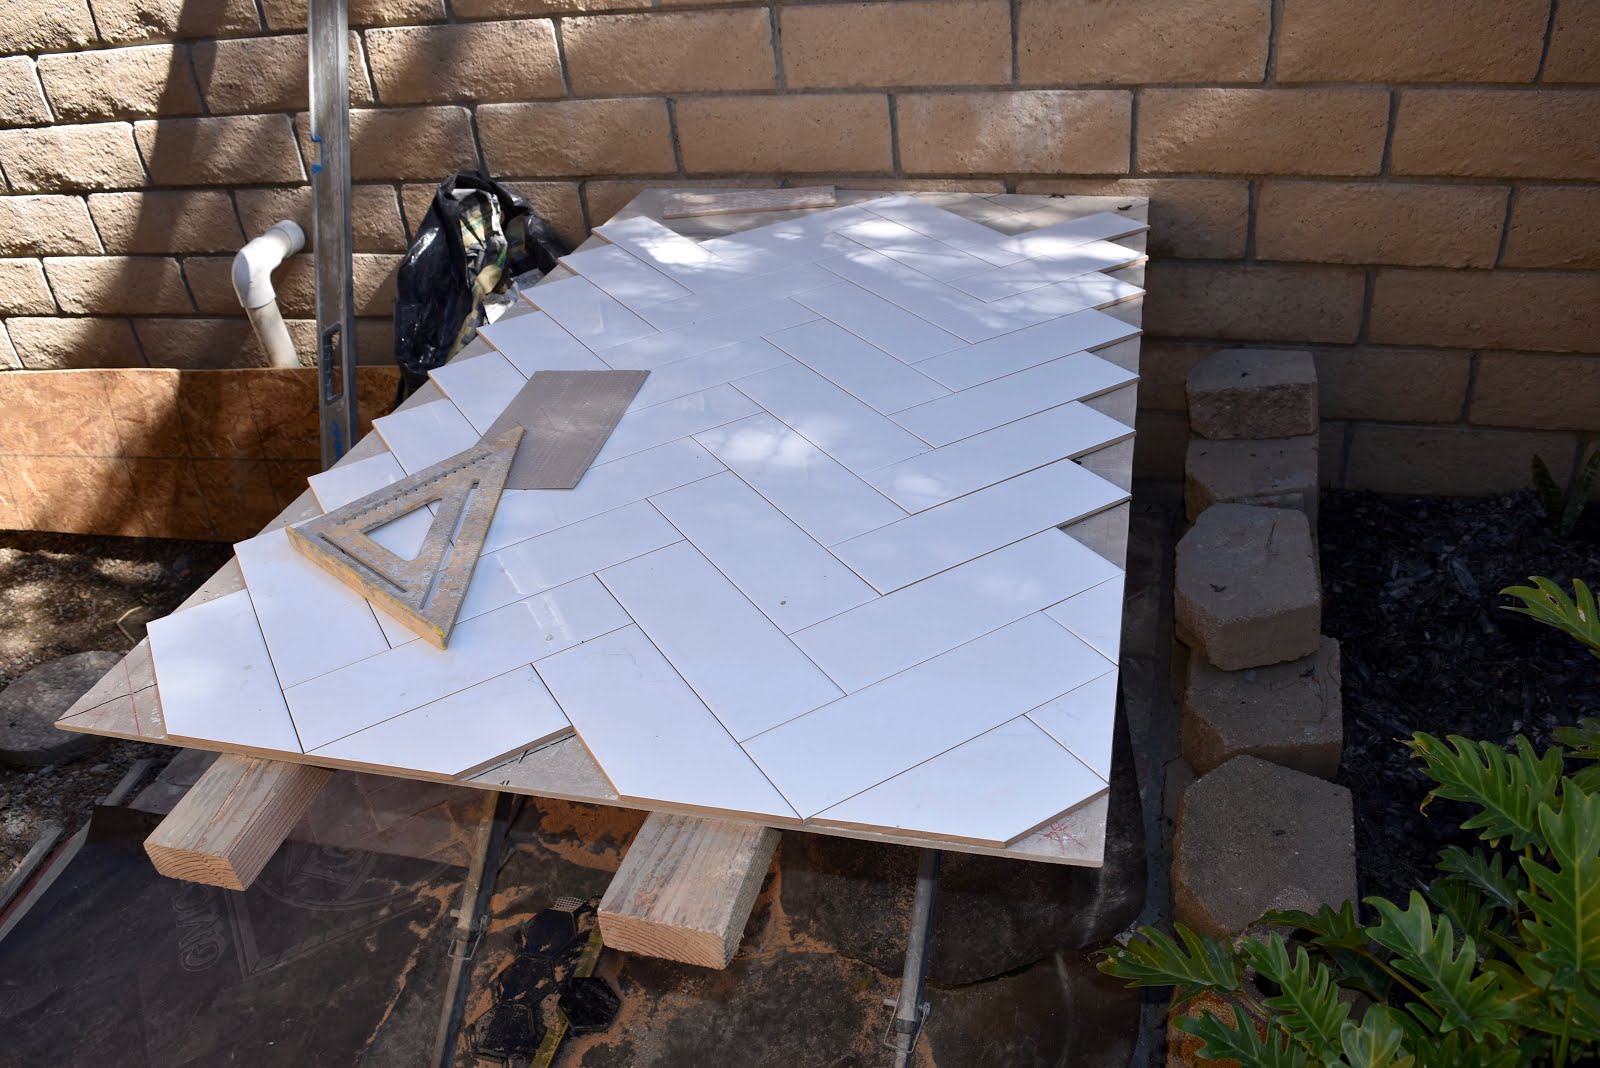
I will have a carrara counter top and carrara herringbone floors.
 |
| Just some of my tile samples! |
I also scored on this cement tile, but only have 66 tiles. I may do the far end of the shower wall, place some teak shelving across it, and have a pretty 'plant wall' for my orchids and violets and ferns. I like classic that the black and white and marble give, but I also like to warm it up by using wood and living plants.
So this is where we are at folks! Stay tuned for updates.
7-22-2016
Trenching the cement slab. Oy. This is where a raised foundation home would be welcome.


We hired someone with a gigantic cement cutting saw to do the trench. This was not a DIY thing! The homes' slab was 4". The add-on part my husband did was over 7' thick!!! He built things to last!


Look at those giant pieces! Thank god for 2 young sons to help schlep it out!
Voila! All cleaned up.

don't even ask about the cut water main in the process. Just a mild inconvenience. Oh well.
We were going to replace the plumbing anyhow ;)
Picked up these mahogany door panels on CL today. Score! All I need is some glass inserts.
I'm going to stain and milk paint these and use them as sliders for the doorway to the water closet.

Kind of a rustic, woody, colorful, bohemian type door.
Here are the doors after I finished painting them. I still have to get the seeded glass inserts.

the barn door I did for the outside of my closet. I got a single swing door off of CL for $25.

Took off the swing mechanism at the bottom and filled it with bondo.
Then I sprayed each glass panel with the 'Mirror Effect' spray. I wanted it to resemble mercury glass so I spritzed with water first. Took numerous coats.
I painted the door with shades of blue milk paint and chalk paint.
Decided I wanted black instead, and painted black milk paint over the blue.
Put up the barn door hardware and track (also from CL,,,only $70!!)


And of course I love the basketweave as well. Did you know it comes in the reverse????? How cool is the black?


Oh, I can't forget my stained glass window insert for the french style casement window!
This will go in between the shower and vanity (where the right french door currently hangs now)

So as of 8/23, here is what the room looks like. Plumbing for the slab is done. Sewer line moved. Shower drain in, vent stack in.


And the pic below shows the shower. the drain, obviously will be the small one. A pony wall will be erected where you see the longer vent pipe.

This week we will tear out these doors, frame it up for the new window, dry wall and frame out the rest of the walls for the closet and water closet area.
8/29
French doors are out, area framed and new window put it.


I just had to see what the stained glass panel will look like!
the area to the water closet is framed. toilet will be where the orange tool box is sitting.
those custom blue doors will frame this opening. Beyond that will be dave's closet. whew!

Elec work done!
So here is what the outside of the door removal looks like. Found a stucco guy on Craigslist,,,eesh,,cringe,,,,,He sounds legit. Here's hoping he can blend it in well.

back of the house where the other french doors are. More stucco repair. I'm also having some guys come out and lay the 1000 bricks for the path back here.

Hub and I started to dig out the dirt and level things...after about 30 mins we looked at each and said, "No way". (we might have used a few colorful phrases too!) I mean, we are just too dang old for this manual labor stuff! And it was 95 that day. I have such grandiose plans for this area too! Herringbone brick path, a more zen planter, would love to to some horizontal wood planks (like my orchid wall) along the stone wall, and of course repaint the house. sigh,,,,where is my magic wand when I need it?

So here is a recap of the design for the bathroom,,,,I still have little tweaks here and there,
My RH vanity arrived! I'm doing Super White Quartzite for the countertop.

Wall mounted Briso faucets in matte black, Rejuvenation Aged brass mirrors, sconces will be similar the RH ones pictured, and i'm leaning toward Kohler Purist in the shower.


thinking about putting these shelves above the faucet and below the mirror. Killer deal from rejuvenation on these. they are a black to match to the faucet. I also want to bring the quartz up along the back for the splash and install the faucets over it. I will then use a cap/border tile to finish it. Glass shelves right above that, and mirrors above that.

RH sconces. 3 of them

encaustic black and white tiles on the far left shower wall for the plants.

the far left shower wall would be similar to this look, now imagine 2 teak wood shelves going across with my plants.
I'm also loving the black basketweave which is going in the water closet area
. 
4X16 carrara on the bathroom floor: In this pattern and size,

3" black marble Hex for the shower floor
:

4X16 carrara on the bathroom floor: In this pattern and size,

3" black marble Hex for the shower floor
:

going to do white 4x12 white subways for the main walls of shower and 3" black marble hex for the shower floor. Here is my Dolomite "Super White" vanity top.

got my seeded glass set in the doors.

To the right is the entry to the bathroom,,,pocket door.
From the reverse angle,,,I'm standing where the french doors are. Straight ahead is the bedroom,,to the left will be the pocket door to the bathroom,,,right is the closet. Got it?? lol
9/5
Electrical work done. Shower floor will be next.

Vent pipe in the floor piece will be in the pony wall. This area will be ready for hot mop next week.
Today will be spent building the frame for the shower floor, including pony wall.
9/8
Stucco repair outside-done. Just have to paint. going to repaint the entire house next year in an off-white that suits the spanish style.

This path area will be completely redone in a herringbone brick path. sigh.

Stay tuned!
10/14
ok,,,been awhile. gotten quite a bit updated.
Got the brick pathway done. Outdoor stucco and paint is done. Have a little bit of tiling to do under the window. got some Mexican Talavera tile in blues for that little concrete area.

Still have to add the Mexican pebbles in the trench along the house. We have a drain way off to the side fence that will be good for rainstorms. this area tends to flood a bit.

The cement tile was laid out so I could apply the sealer to it. All 66 of them. Left them out here during the rain storms. (well they are for a shower!)

the drywall is done...YAY!!! Took me about 10 hours to prime all of the dry wall in both areas, plus the small closet, and paint!And I still have more to do!
Dry fit the vanity to make sure the faucets line up properly. Had an issue w/the electrical so hub will put them on a different switch and locate it next to that outlet.
hung up my cobalt doors,,,still have attach the gold hardware

Had the shower hot-mopped, and this is the tile that will go on the back wall.

Next to the concrete slab cutting, dry wall has to be the most horrible to live with! I mean seriously.

Hubs closet. This is what used to be our shower/toilet area!! Hard to believe.

Walls are gray and the ceiling is a Ralph Lauren Napoleon Blue.

Can finally take down the plastic door once and for all.
Ordered this acacia herringbone pattern for the bedroom and that hallway area. this wood matches our current wood flooring in the entryway and outer hallway.

here is the wood in the hallway.

stay tuned!
Did a bunch of little, detail stuff,put the trim around the skylight. We ripped some white oak into 2" planks and I stained them a weathered oak and wiped some liming wax over the grain. Pretty good match to the ceiling, eh??

Hung the blue doors. and along w/that zebra pic, my black crystal chandy!!


Had some vintage door hardware that I repurposed and will attach to my blue doors.


had the leftover leopard from my install. he's going to have to deal.

Hired someone to grind down high points on this slab and then do a self leveler. Much better.


This was the white oak planks that I've stained for my window casing and door casing. Same procedure as doing the french doors.

My custom oak window casing, saddle and apron, all done in the same ebony stain. done!


Nov 16,,,
Finally! Some real noticeable progress. My herringbone floors are going in!
this is the 3rd day of this 350sqFt install. Herringbone takes 4X as long to lay than a regular layout. It's wayyyyyy tedious. I feel so bad for my guys. But at least it's something different for them to break up the monotony. They had only laid one similar once or twice. So the first few hours was spent making sure we got dead center. I showed them the correct method for the starting point and this is what took so long. It's not as easy as just starting in the middle!


Since this hallway was the main focal point when you walk into the room, this is where we started. Both sides ended up exactly symmetrical!

2nd day...

3rd day

the 4th day will finish w/setting a few more boards and doing all the finishing cuts against the wall.

The acacia is natural but tends to come off very warm in the photos. If you look at the 2nd pic above with the man in the orange shirt, that's the true colors of the wood.
finally,,,,floor is done! Baseboards in (still have to paint them). We decided to run the wood up the bottom portion of the platform around the bed. I tried to pick out planks that matched perfectly with adjoining pieces. Almost looks like it's floating.


tiling the bathroom is all that's left. I just have to wait for my order to arrive from china.
Feb. 2017. Tile came in a few weeks ago. Delay due to tons of rain around the home. Some of the wood flooring got wet by those french doors. the window insets were not sealed properly and water leaked through, flooded up and over on the inside, and warped some wood planks.
Here's the tile:
carrara, bathroom floor, water closet floor-black basketweave.

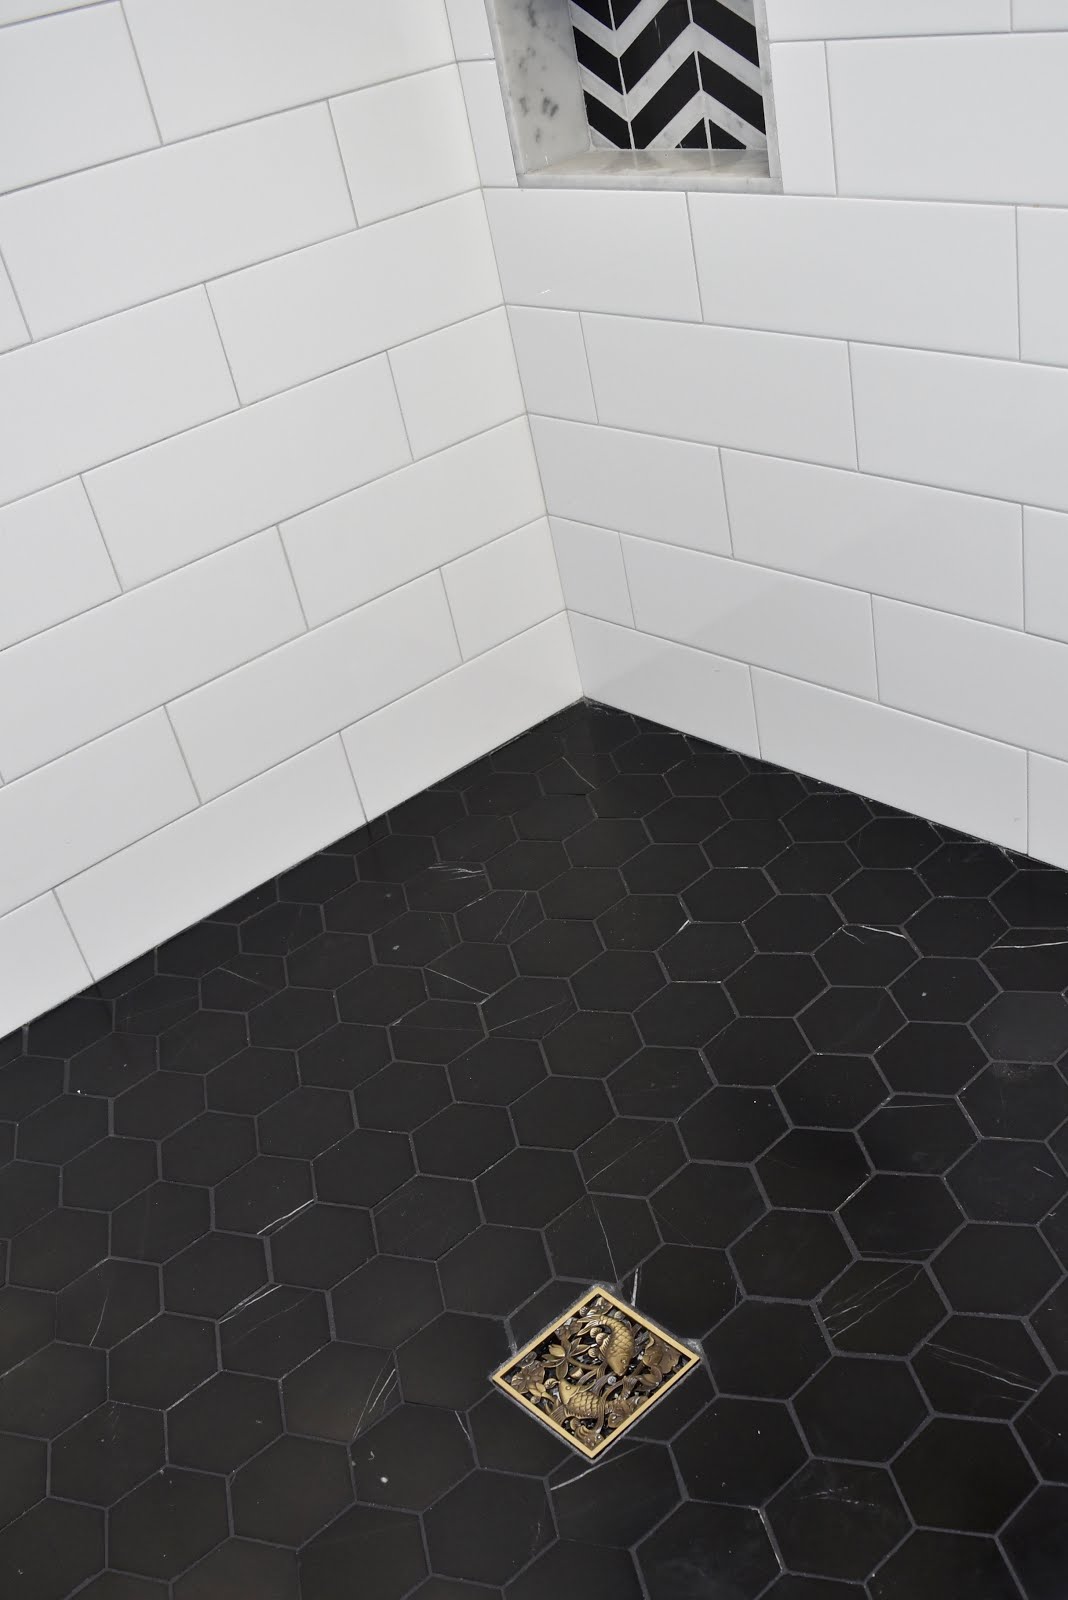
Shower walls, white subway. black marble hex on shower floor.


cement tiles up that left wall. Mapei FlexColorCQ Grout.
had to figure out all of the measurements for location of niches and the shelves on the back wall. Fractions! yay. not.

the walls will have mud on them next week and finally the tiling can start after that!
All this rain has delayed things quite a bit. It never rains in Southern Calif?!!! Hah!
It sure has this year.
3/1/17
MOVING ALONG AT A GLACIAL PACE
shower was finally mudded.

herringbone accent for the shower wall took forever to lay out, along w/the surrounding tiles
having issues w/the marble hex. don't know if it was me (I tried a sealer on a sheet or two) or if the color in one box was different from the rest, but this won't do! restoration guy will come out next week and sand them to get them all the same color and re-hone. sigh. what' another week?!


putting on the final coat of sealer on these encaustic babies.

you can see the lag bolts we set in the wall to hold up my teak shelves. I got a 6' board of solid teak and cut it down myself, sanded and oiled it.


slowly but surely, tile is getting done.

3/30/17
finally. tiling is done. now all the fine detail fixes. valve was too long so had to remove a few tiles and reset it.

Also going to have restoration guy come out and do this marble shower floor.
some of the tiles were a different finish and it's obvious looking.
But here is my Koi Drain Cover!


trying to figure out what kind of doors I want to do.
and of course my long awaited teak shelving plant wall:


floors were done and they came out great.


once all the bells and whistles (baseboard molding) are installed, i'll post my final pics and be done! yay.
4-16
baseboards in. plant wall done. I'll change them out periodically. got some of my air plants hung.


I love my blue doors. If I ever sell this house, they're coming with me!


love to open the window and let the fresh air and sun rays inside. I also get to look at my babies!


close shot of the french oak flooring on the ceiling

My craigslist fine. French Oak flooring. hub and I did it in 2 days.


I painted the little blue cactus pot, the gold one and the solid white pot

I like to switch up the plants. eventually I'll land on something and stick with it! waiting for my orchids to bloom and I'll bring those in.


Tommy, my ginger.

He's just a little on the creepy side. likes to come in and sit on the bench while I shower.

Just like this! lol. Damien is the old guy of the group.
And a few updated pics of the bedroom area. I got Justina Blakeney's cobalt colored quilt from the Jungalow and love it!


Damien.


this pocket door will get finished, eventually

Custom made standing mirror w/200 year old black walnut


time to bring in the orchids


This is such an ambitious project! I love your inspiration photos - this is going to look amazing!
ReplyDeleteWell Holy Hell that looks good! I just don't have as much creativity in my bones. Loving reading your blog. Hey wanted to throw out there for another finish idea; "black ink". My hubs built his sister a bed and stained it using black ink. Looked fabulous! Yep, you can buy black ink by the quart or gallon. Covered with waterlox. (Melissa R on Houzz)
ReplyDeletegood idea! thanks for the visit!
DeleteAbsolutely gorgeous!!!!
ReplyDeleteThis comment has been removed by the author.
ReplyDeleteCan you share how long it took the whole project? And how was your experience ordering your tiles from China? Would you share the vendors? I wanted to order from there for my kitchen floor but I'm afraid! Thanks!!!
ReplyDeleteordering was a long process. I dealt w/a rep directly in China. Since it was my first time I was worried it was a rip-off, but it wasn't. it was a legit company. But there are a lot of rules regarding importing and getting it through customs. You have to read the guidelines and rules, but it's easier to hire a customs broker to file the paper and get it through customs. If you are not near a port to pick up the items yourself, the delivery is expensive .
DeleteI like viewing web sites which comprehend the price of delivering the excellent useful resource free of charge. I truly adored reading your posting. Thank you! find more
ReplyDelete