I came across this vintage Thomasville dresser and nightstand. Now, it wasn't horrible, just
a bit dated. Everyone always does white and gray or combos of said colors. I wanted to try
something different.


The tops on these are that laminate type of paint. I really don't know what it's called.
I wanted to see what the wood top was like,
but wasn't one of those nice enough to refinish.
BTW, here is a pic of it's partner night stand that I had done in my own "Elvis Presley" blue. I had seen one done very similar to this over at "Thee Velvet Glove". I loved how hers came out so I just had to try this color!

I made up my own chalk paints. Since it's not like ASCP (no prepping needed) I did quite a bit
of sanding and priming, just to be on the safe side. In fact, that laminate white-yellow paint that
was on the drawers was a pain in the bum! Places where I didn't sand it off well enough didn't provide the adhesion for the black paint. Just when I thought I was done w/the drawers I had to sand off all of my freshly painted black and re-sand the original paint off completely. Then, prime and re-paint the black and wax it,,,,again! Nothing like duplication of work. Really love it. uh-huh. This is where you ASCP people say "See? This is why you don't make your own." Well, yes and no. I admit, ASCP is so easy. However, she doesn't have a true black. Graphite is, well, graphite, not a deep, inky black.
So, a trade-off is sometimes necessary.

I used Martha Stewarts metallic gold paint. And a gold spray metallic on the handles.

This was by far the most time consuming paint job! Took me forever because of the
3 different colors. I had to keep doing touch-ups. All the gold edging on the drawer fronts were done by hand with a small brush. 2-3 coats. The gray took numerous coats too. Once I would sand, I saw bare spots and would do touch-ups. Ditto with the black paint! Oy. I thought I would never finish!
 I think on a few of the drawers I taped and then sprayed the molding part with a gold spray paint.
I figured it would be easier to get a good base and then just do a touch up with a small brush
and the MS metallic paint. However, as you can see, the taping off part was not a fun party.
No-siree-Bob! Wayyyyy too much extra effort. It didn't matter what I did, it was going to be
time consuming. And it was.
3 different colors. I had to keep doing touch-ups. All the gold edging on the drawer fronts were done by hand with a small brush. 2-3 coats. The gray took numerous coats too. Once I would sand, I saw bare spots and would do touch-ups. Ditto with the black paint! Oy. I thought I would never finish!
I figured it would be easier to get a good base and then just do a touch up with a small brush
and the MS metallic paint. However, as you can see, the taping off part was not a fun party.
No-siree-Bob! Wayyyyy too much extra effort. It didn't matter what I did, it was going to be
time consuming. And it was.
 |
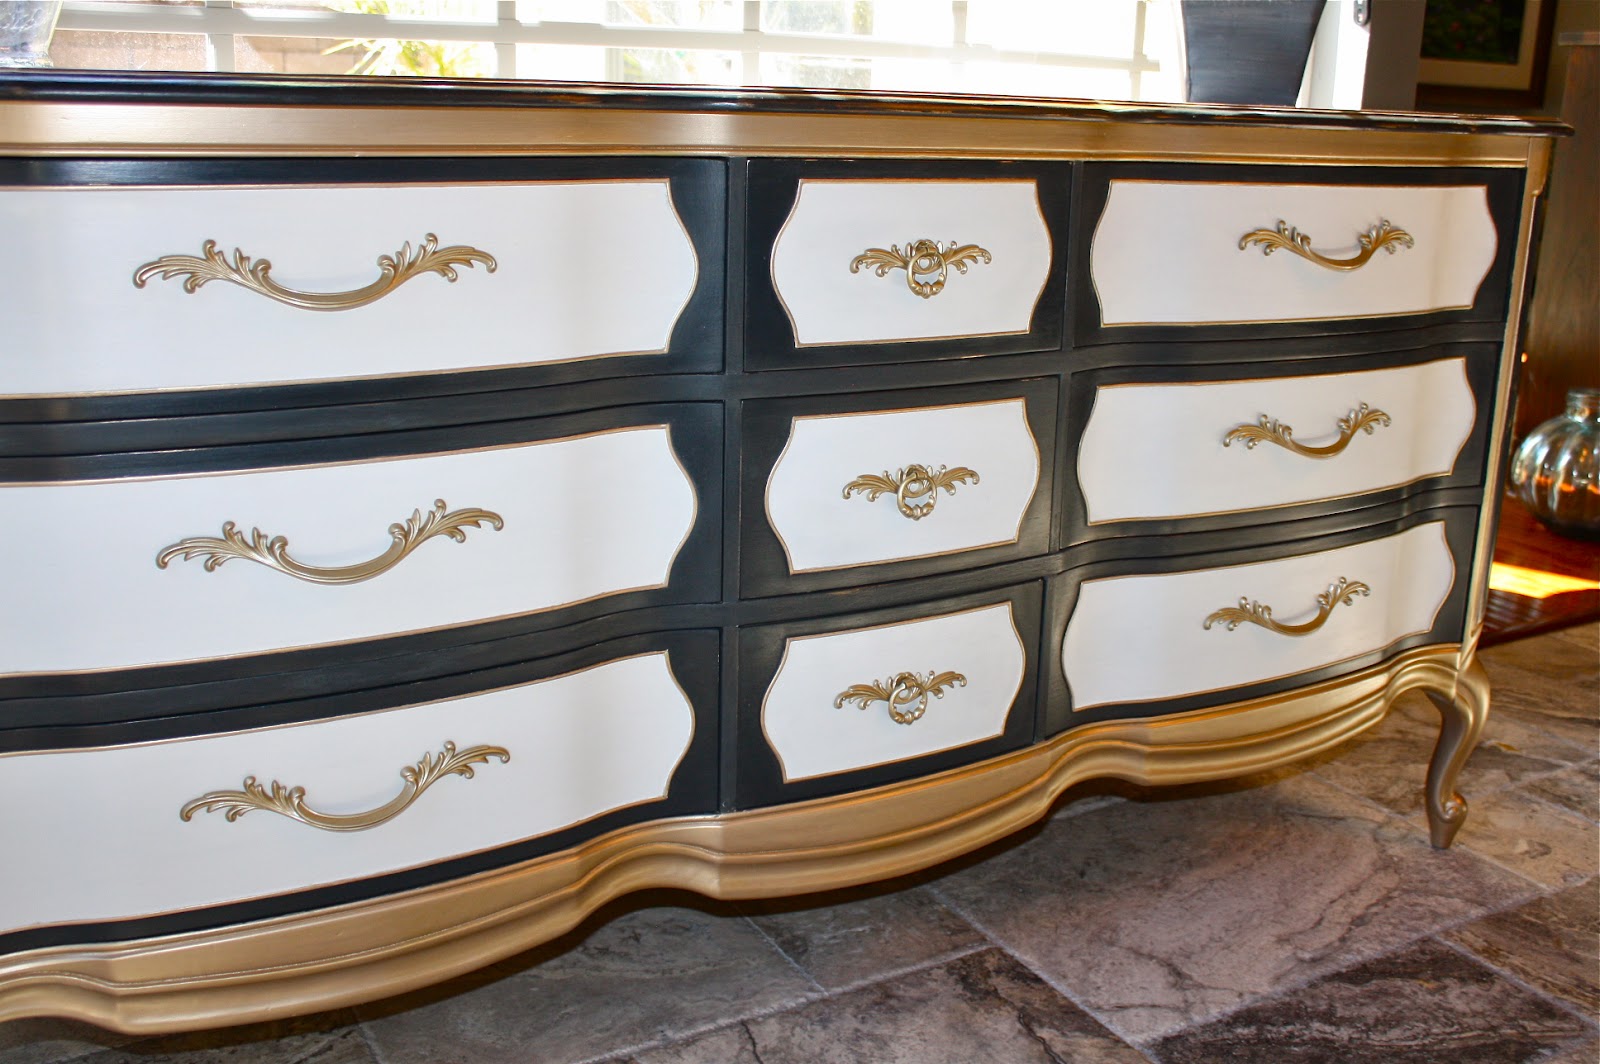
| Close-up of the detail work on the drawer front. |

Putting a nice finish on black chalk paint can be tricky. I've found that using a steel wool
to lightly smooth and sand is better than a harsher grit. And using the steel wool to buff the wax
off puts on a nice sheen.


In hindsight, I probably just should have gone with an enamel.
But I did want some light distressing. I used a wipe on urethane on top, sanded
with steel wool, and then used numerous coats of paste wax. The top is smooth as silk!

Same view, taken during day and night.

Linking up at my fave parties!! :
Kammys Korner - Trash to Treasure Tuesdays
Domestically Speaking - The Power of Paint Party
Miss Mustardseed - Furniture Feature Friday
Redoux - Friday Link Up Party
Funky Junk Interiors - Saturday Night Special
Knick of Time Interiors - Knick of Time Tuesday
Tuesday-Elizabeth and Co., My uncommon Slice of Suburbia,
Absolutely gorgeous! No one will ever call you a one trick pony, that's for sure!
ReplyDeleteThis comment has been removed by the author.
ReplyDeleteThat's really beautiful, you did a great job! Jacqui www.brookeeva.com
ReplyDeleteThis is lovely. What a fantastic job you did on this piece. And I hear what you are saying about the tediousness of taping. Been there, done that. Ann Marie @ Iris Abbey
ReplyDeleteWow- that looks so rich, elegant and very designerish! You really gave it a new look and your choices of color and accents are perfect. The small piece in the cobalt blue is cool!
ReplyDeleteThe gold accents are just stunning!
ReplyDeleteThis is gorgeous. Stunning! I can see it was a ton of work - great job!
ReplyDeleteThanks for sharing it with us!
I am featuring it this week.
Stacey of Embracing Change
This is STUNNING!!!! I know the time it took to accomplish all the details. Wow! I'm in Aww really! Please come share this on a party I cohost, DIY Sunday Showcase! It's open now! I would love to pin this to our talent board!
ReplyDeleteShelly
minettesmaze.blogspot.com
really stunning!!! absolutely LOVE the gold - makes it elegant and edgy at the same time. brilliant job!!! visiting from the funkyjunkinterior link party.
ReplyDeleteWOW - WOW - WOW - this is unbelievable - just gorgeous!
ReplyDeleteHave to find something to do in black and gold now :)
Beautiful transformation :)
XOX
The Gold and the black make for a stunner!! Thank you so much for sharing!
ReplyDeleteI think this is just stunning, the colors really make it a modern, statement piece. I'd love for you to share it at my first every link party tomorrow, Jan 31st, at FlyingC-DIY.com. Hope to see you there!
ReplyDeleteIt's very pretty! Have you ever used the gold leaf pen? I use that on the small stiles like the ones you taped and sprayed. I think you'll find it quite a bit easier, great job on this!
ReplyDeletehow much is this piece?
ReplyDelete