Wednesday, August 20, 2014

Wood wall art/headboard

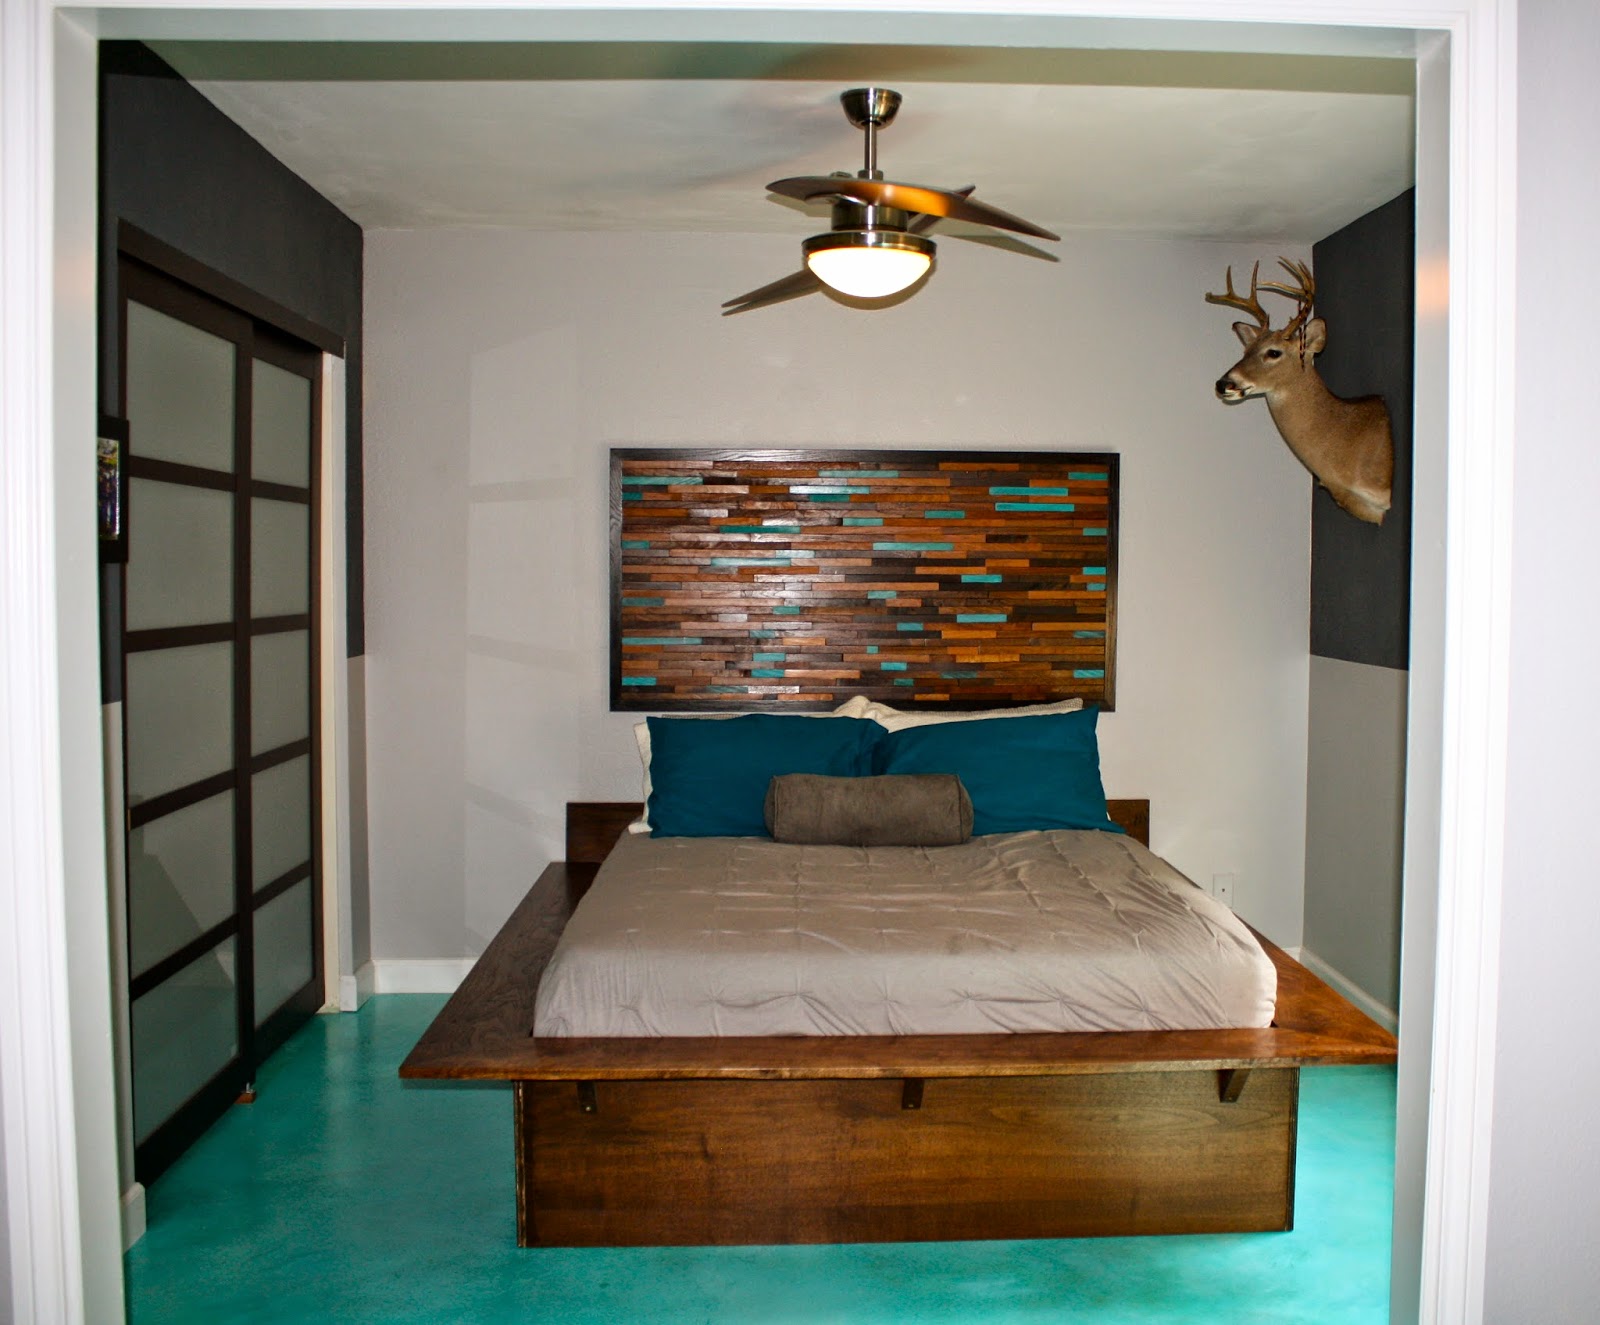
Feels so good to be working again! That whooping cough took me out of the loop for awhile!  I was finally able to finish my sons headboard/wall art to go above his platform bed. For that post, click here


The sleeping portion of his room. You're looking through the opening of the wall we cut into to make his room larger. That half is his "hang-out" part. TV, computer, futon for friends to sleep over, etc. 

 The boards above are what I started with. I ripped all of them into 1" pieces and then cut those to fit like a wood floor. Alternating lengths.  


             Once the boards were cut down, each one got sanded, stained and coated with a sealer. I laid them out on the plywood to determine the size I wanted. 


    Here is a shot of the room before we did the acid staining concrete treatment. 


 The plywood backing board was squared off and framed. You have to make sure your measurements are dead on to avoid ending up with the last row being way off. As it was, I had to plane off almost an 1/8" of an inch due to some of the boards bowing and taking up more room. 


I tried different bedding ensembles!


Linking up at my fave parties!! :


Sunday, August 17, 2014

GF Lamp Black on a Gimpy Vintage Buffet

I have heard all sorts of wonderful things about General Finishes Milk paint, specifically
Lamp Black, that I finally got around to giving it a whirl. 
This isn't really milk paint. It's an acrylic paint that is hands down better than any other black paint I have used. I love the way it brushes and finishes so dang smooth! 
Like buttah! 

Here is my beautiful amputee buffet that I started with. (Is it ok to end with a preposition?)
Anyhoo,,,the seller did have the leg. 
       I must have glued this four different times. It's a bad spot. Every time I moved it, it 
       broke again. I was unable to get the nailer into it for a more secure hold.  Whatever. 
I really dig the mahogany top with black. The contrast is amazing. I stripped off the majority of the existing finish, and sanded the rest to even it out. 


                                                  3 coats of wipe on GF urethane
I find it next to impossible to capture decent photos of black pieces using a flash.  
I did a lot of layering with blues and greens to break up the black a bit. Trust me when I say the photos don't do this justice. The colors are much more subtle in person. The flash just does horrible things! The distressing to highlight the colors are also much milder. 


The two smaller drawers got lined with this cool decorative wrap paper that I found online.  
Overall, I love this paint! This piece got two coats with sanding in between and a wax finish. 
 I know, I know.  That leg looks a little askew. Sigh. It must have gotten moved while drying. 
Moved it across the room under my leopard photograph. 


Linking up at my fave parties!! :


Kammys Korner - Trash to Treasure Tuesdays
Domestically Speaking - The Power of Paint Party
                                Stacey Embracing Change - Thursday 
                         Miss Mustardseed - Furniture Feature Friday
Funky Junk Interiors - Saturday Night Special
A Stroll Thru Life - Inspire Me Tuesday

Monday, July 21, 2014

Building a Platform Bed to go with a Bedroom Re-Do!!

It seems like it's been ages since I've worked on anything! I have a really good excuse,,,,Pertussis!!
Yep. Good old whooping cough. Who in the heck gets whooping cough now-a-days??! Um, me?
Let me just say, get your vaccines!! You DO NOT want to get this. I won't go into details (google it) However,  I will say gasping for air every morning upon waking for weeks on end is not a good time. 
                     Anyway,,,,,I was in the middle of my sons room re-do when it hit.
Here's what was in the works,,,,,, I wanted to redo my sons room my acid staining the concrete slab (no more carpet in there!) and building him a platform bed that resembles this:       

I decided to use solid walnut and a walnut plywood (for the base).  For a headboard, I thought I would do one of those artsy pieces where you cut pieces of wood of different sizes 
and lay them out on a board. 
Something like this:
Here is the bed-making pics.  We just started with some measurements and built as we went. 
                         This is the walnut ply (used 1 4X8 sheet) that was Kreg-Jigged together.
 This is the solid walnut that will be attached to the top as a cantilevered edging
 OMG,,,,,we had to drag the mattress out in the garage to make sure we had the measurements right!!  Good thing it fit because we did this AFTER the Kreg Jig part!! DOH!!

The mattress actually sits on another piece of plywood that spans the entire section and is supported by the corner pieces, as well as the cleats on the sides. 
  
All the supports are done and edging is on.  I bet you're wondering how in the heck are you going to move that into his room.  
Uh-huh. That's what I kept saying. He said, "it will fit. don't worry".
(you can guess what this is leading to.....)
 I did the majority of the sanding at this point. The whole thing took about an hour. 
 I pre-conditioned the wood and applied a few coats of Espresso/Dark Walnut
 I just love working with walnut. It's gorge! However, I wasn't real thrilled with the ply used on the base. After I applied the stain, I saw a few spots that I messed up with the sander. Also, you can see some of the dark spots and spots that didn't take the stain well. That's from over zealous sanding. Another disadvantage using ply, the ends. They look icky. Something has to go over those edges. 

Since it's not fully completed, here is a quick peek of the bed in the room. 
OH,,,yeah, about the trek of getting this from the garage into the room,,,,,Lets just say we had to go around the driveway, through the front door and out the fresh doors to the backyard, over the bridge of the koi pond, through the double doors into the master bedroom which
 happens to be a straight shot to the sons bedroom!  
Piece of cake!
 Oh, did I mention how heavy solid wood is????
Hmmmm??? Mkay, thanks.


So here is the 6' long board where all those 1" Jenga-like pieces are getting glued to. 
Yes why thank-you. I did rip every single one of these. First into 1" long pieces
and then cut into individual sizes. 
               Since I had to stain the sides and ends, I stained after I did all the cutting. 
 I decided to throw in some turquoise pieces since that's the color of his concrete floor.
Here's where I'm at today. Gets a little dicey with the measuring at the end. I'll write up a whole other post when this baby is done. If I ever get back my energy.......


Here's the room getting a skim coat of concrete over the existing slab
 After applying the turquoise stain...


The only thing that I don't like is the edges. because it's plywood, an edging veneer should be used. But what the heck, half the time this bed isn't even made! Boys! 

Wednesday, June 11, 2014

Broyhill knock-off in Red!

I snagged this Broyhill look-alike last month. I really enjoy working on these.
                           After I stripped away the ugly finish, I was left with this:


After stripping the top and seeing the almost perfect walnut, I couldn't paint it. 
Well, not all of it anyway! I'm not a big red person, but I wanted to go a bit more masculine with this piece. Plus I had planned on facing the inner drawer fronts with this cool Ikat fabric I got. So I decided to coordinate the doors with that.


The flash really makes this red appear neon. It's not. Really. 

And of course I had to do the sides of the drawers! Just my "thang"!
                           I did the black by hand/brush. Too lazy to get out the sprayer. 


 I love the original hardware. After I let it soak in vinegar and baking soda, I applied Brasso and scrubbed it with steel wool. Almost like new again. 
                         
 I am literally running out of places in my home to stage. I really don't like the framed art work above this piece, but I can't be bothered with hanging something else! Even though I have a really cool framed poster that would go so much better!  sigh.....later...

                This one is for sale in my Etsy shop, "FourAcesVintage"


Linking up at my fave parties!! :